Create ZFS Storage in Proxmox VE

Running VMs and containers in Proxmox? ZFS is one of the best storage backends you can use—offering snapshots, compression, data integrity checking, and excellent performance. This guide walks you through creating a ZFS pool in Proxmox VE and adding it for VM and container storage.
Why ZFS on Proxmox?
- Native snapshots for instant VM/container backups
- Data integrity with checksums
- Excellent performance for virtualization workloads
- Built-in compression to save space
- RAID-like redundancy without hardware RAID controllers
Prerequisites
- Proxmox VE installed (installation guide here)
- Two or more disks for your ZFS pool
- Important: Use a non-RAID controller or set it to HBA/passthrough mode—ZFS works best with direct disk access
Step 1: Verify Your Disks
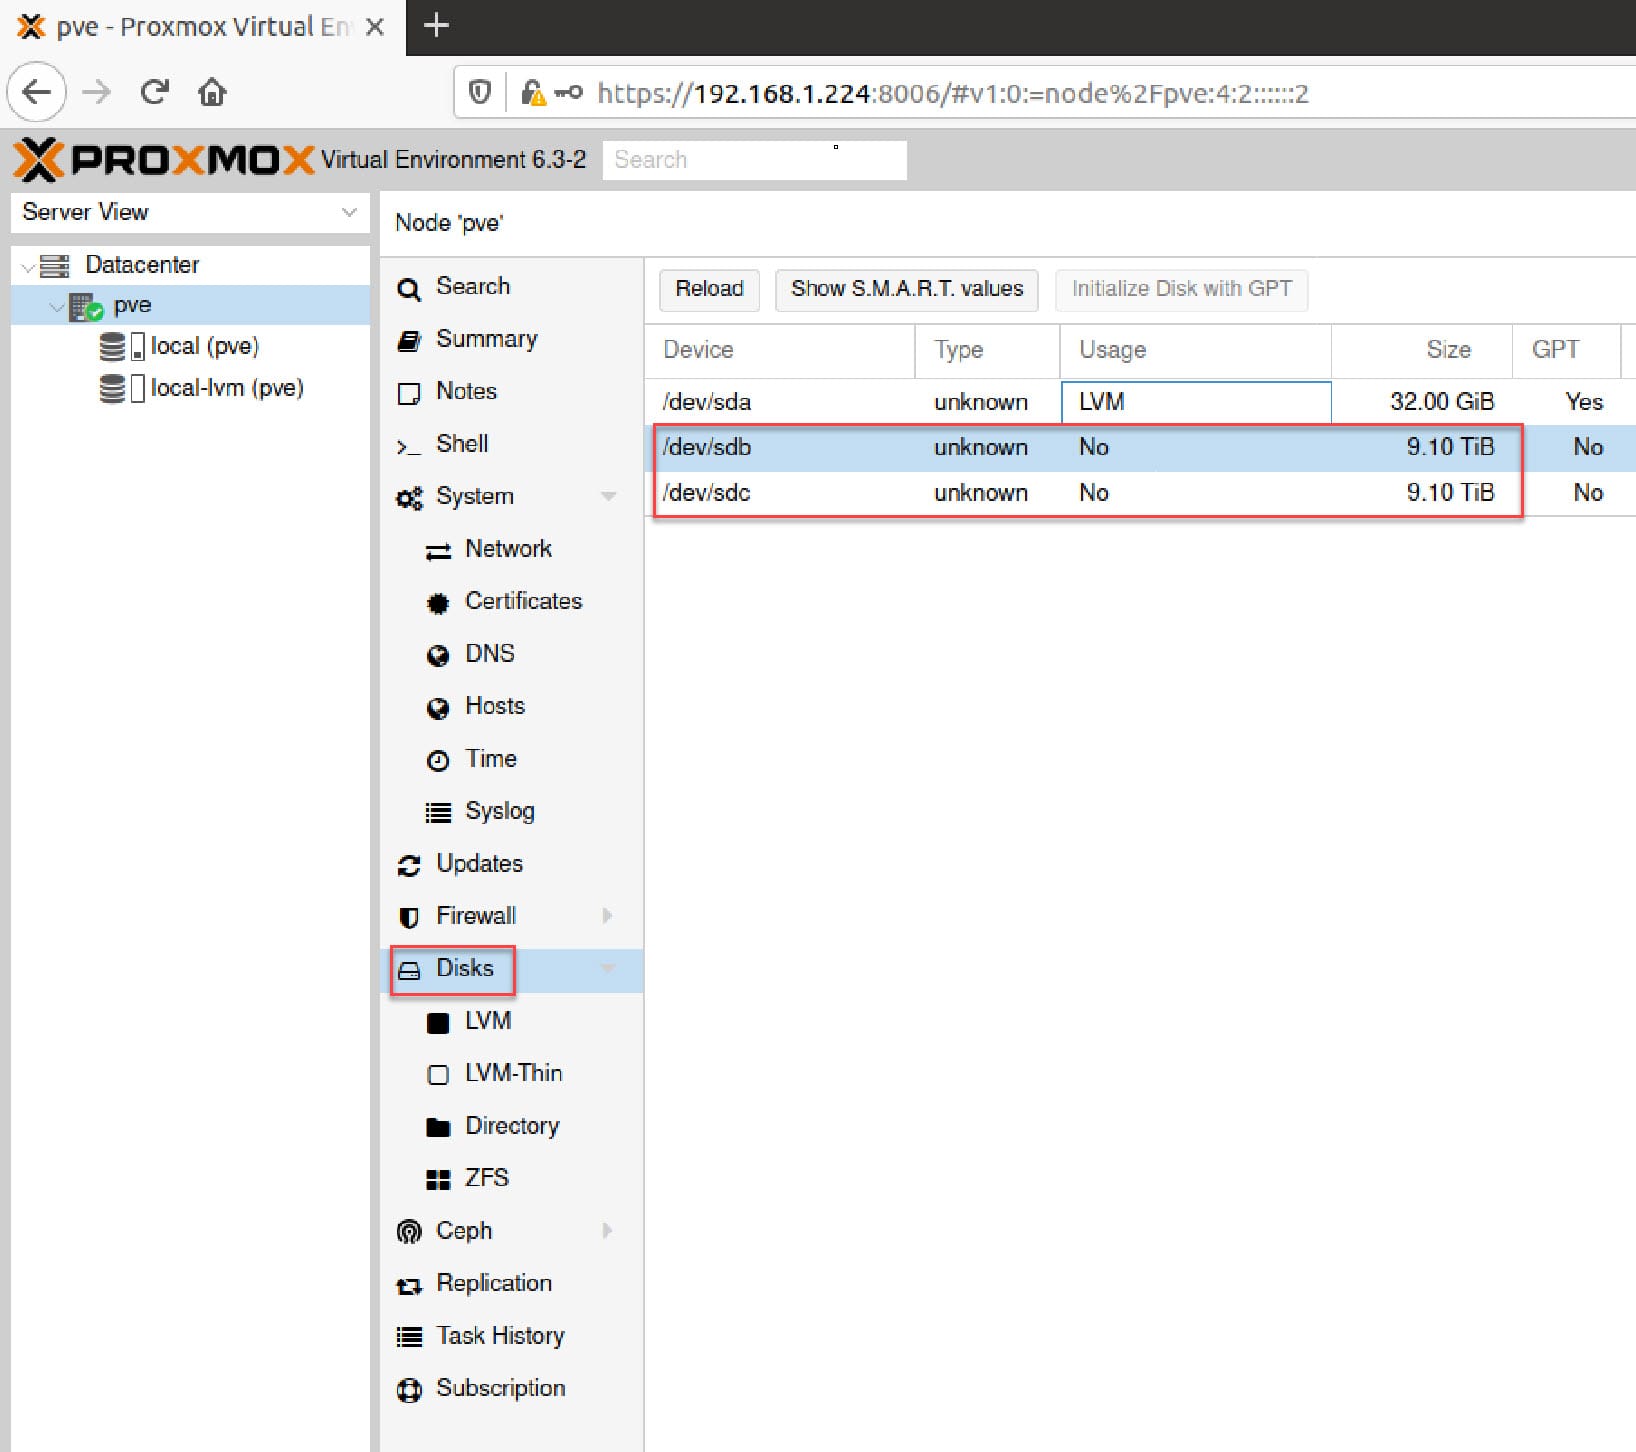
First, check that Proxmox sees your disks. In the Proxmox web UI, navigate to your node → Disks.
You should see all available drives. Note which ones you'll use for ZFS (in this example, we'll use /dev/sdb and /dev/sdc).
Step 2: Wipe the Disks
Before creating a ZFS pool, wipe any existing filesystem signatures from your disks. SSH into your Proxmox host and run:
bash
wipefs -a /dev/sdb /dev/sdcReplace /dev/sdb and /dev/sdc with your actual disk paths.
Step 3: Understanding ZFS Pool Types
ZFS supports various pool configurations similar to traditional RAID levels:
Mirror - Data replicated across all drives
- 2+ disks of size X holds X bytes
- Can lose N-1 disks without data loss
- Best performance for reads
- Recommended for most homelab setups
RAIDZ1 (similar to RAID-5)
- Single parity disk
- Can lose 1 disk
- Minimum 3 disks recommended
RAIDZ2 (similar to RAID-6)
- Double parity
- Can lose 2 disks
- Minimum 4 disks recommended
RAIDZ3
- Triple parity
- Can lose 3 disks
- Minimum 5 disks recommended
For most homelab users, mirror offers the best balance of performance, simplicity, and redundancy.
Step 4: Create the ZFS Pool
Create a mirrored ZFS pool named tank with two drives:
bash
zpool create tank mirror /dev/sdb /dev/sdcImportant Note: We're initially using device paths (/dev/sdb), but we'll fix this in the next step to use persistent identifiers.
Step 5: Use Persistent Disk Identifiers
Device paths like /dev/sdb can change after reboots or hardware changes, which will break your ZFS pool. Instead, use /dev/disk/by-id/ identifiers (as discussed in our previous post on ZFS disk identification).
Export and re-import the pool with persistent identifiers:
bash
# Export the pool
zpool export tank

# Import back using by-id
zpool import -d /dev/disk/by-id tank
Verify Persistent Identifiers
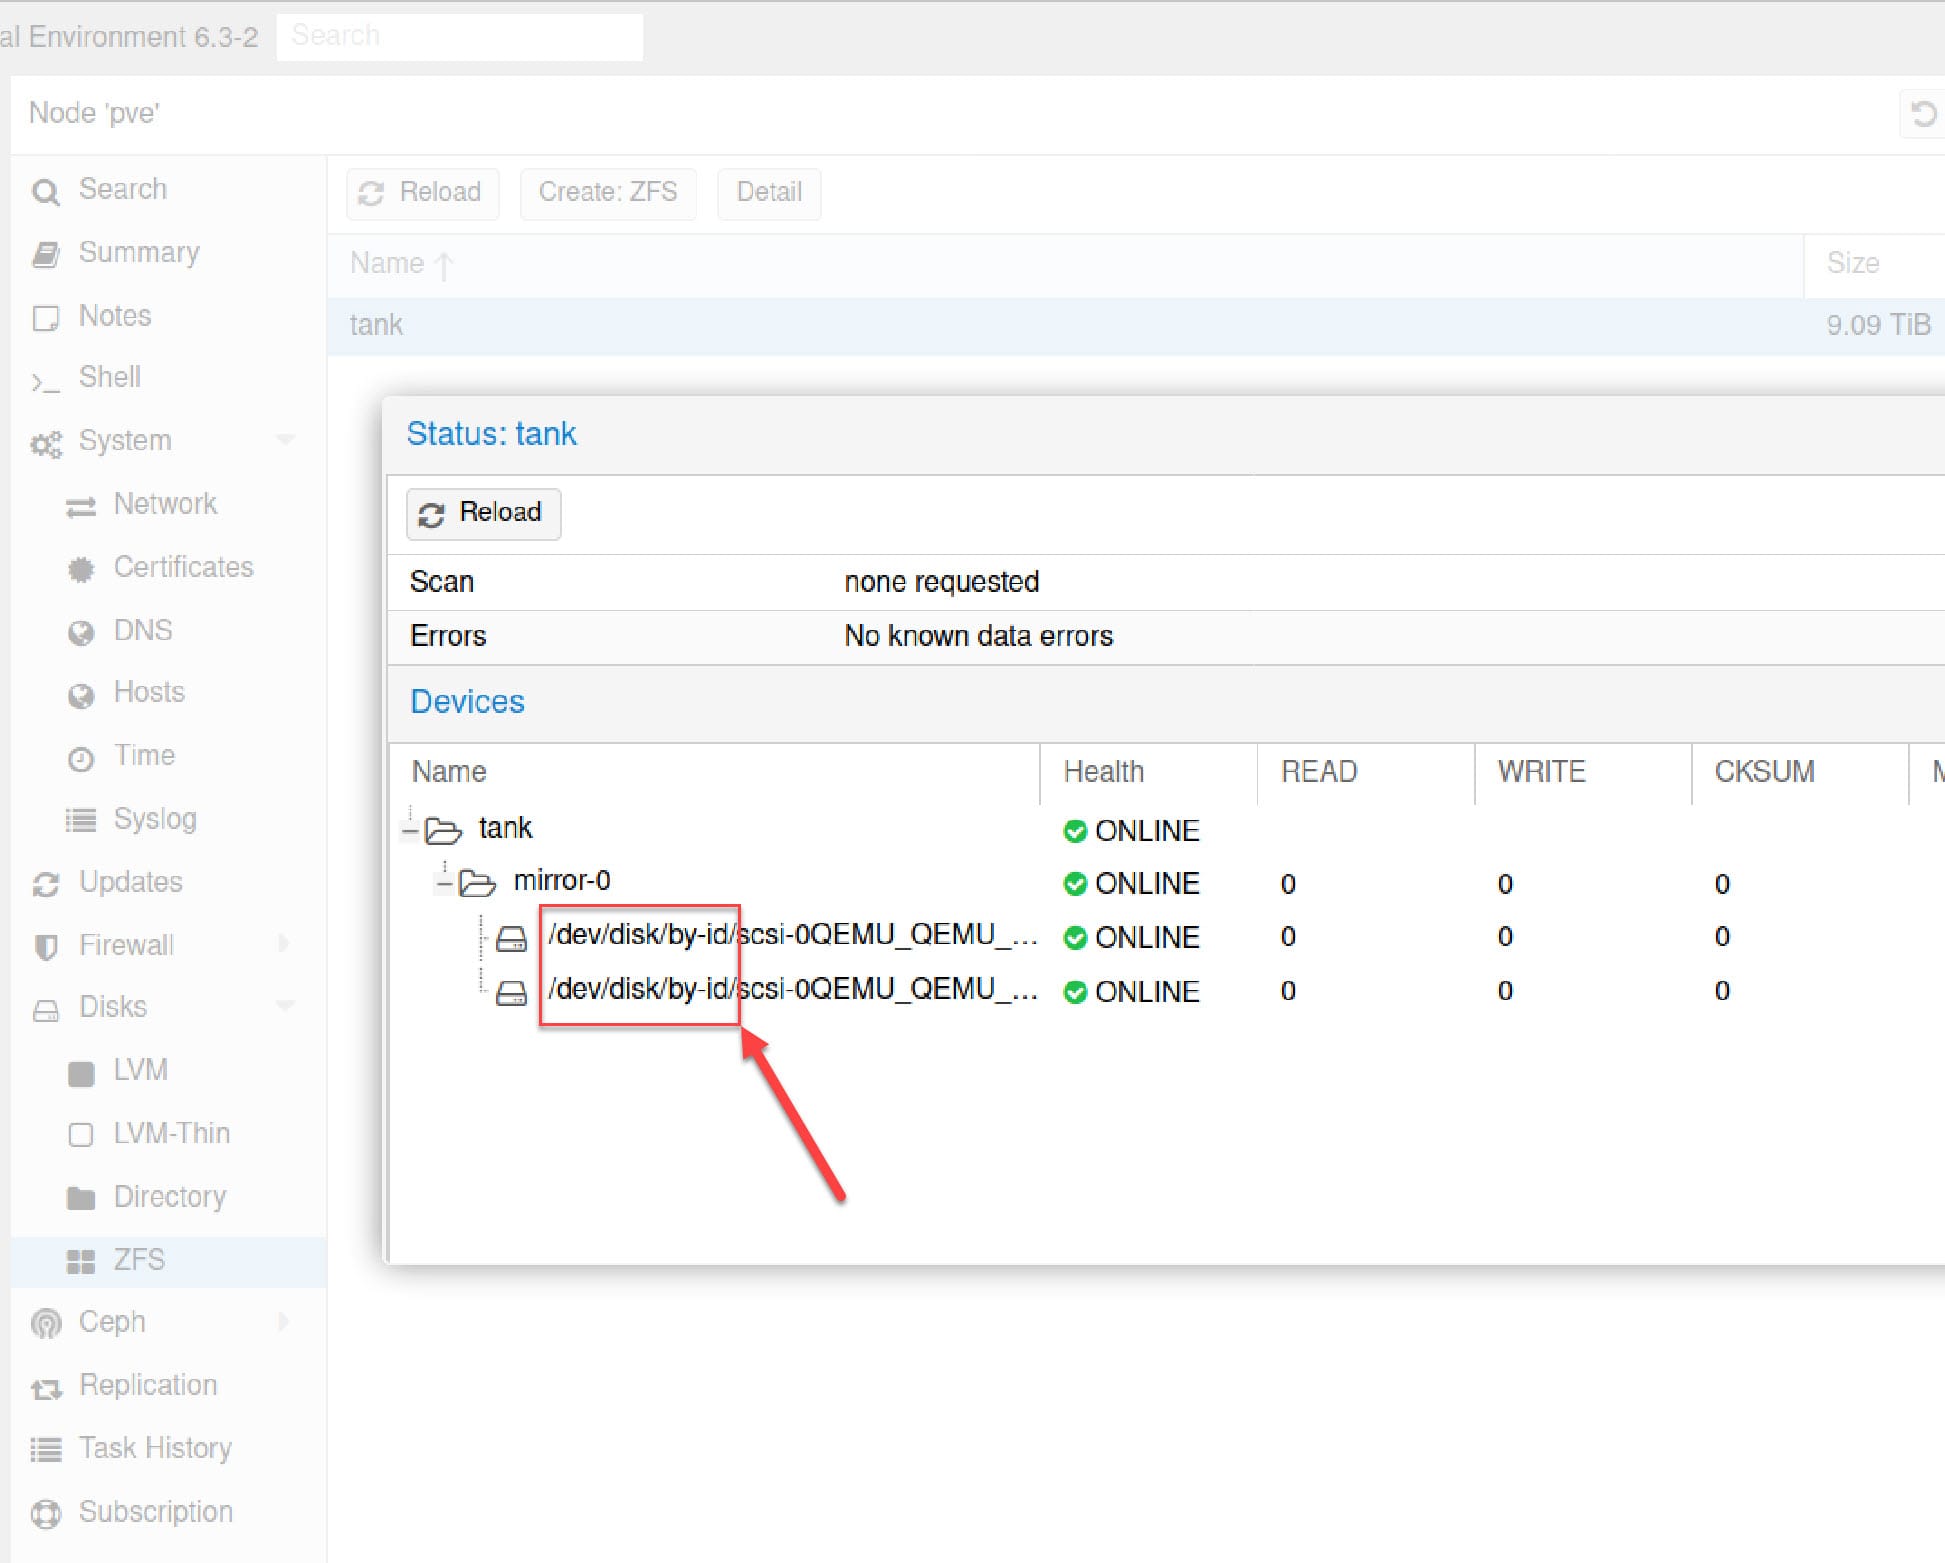
In Proxmox web UI, go to Disks → ZFS, select your pool tank, and click Detail. You should now see /dev/disk/by-id/ paths instead of /dev/sdb.
Step 6: Add ZFS Pool to Proxmox Storage
Now add the ZFS pool to Proxmox's storage configuration:
bash
pvesm add zfspool tank -pool tankVerify in Web UI
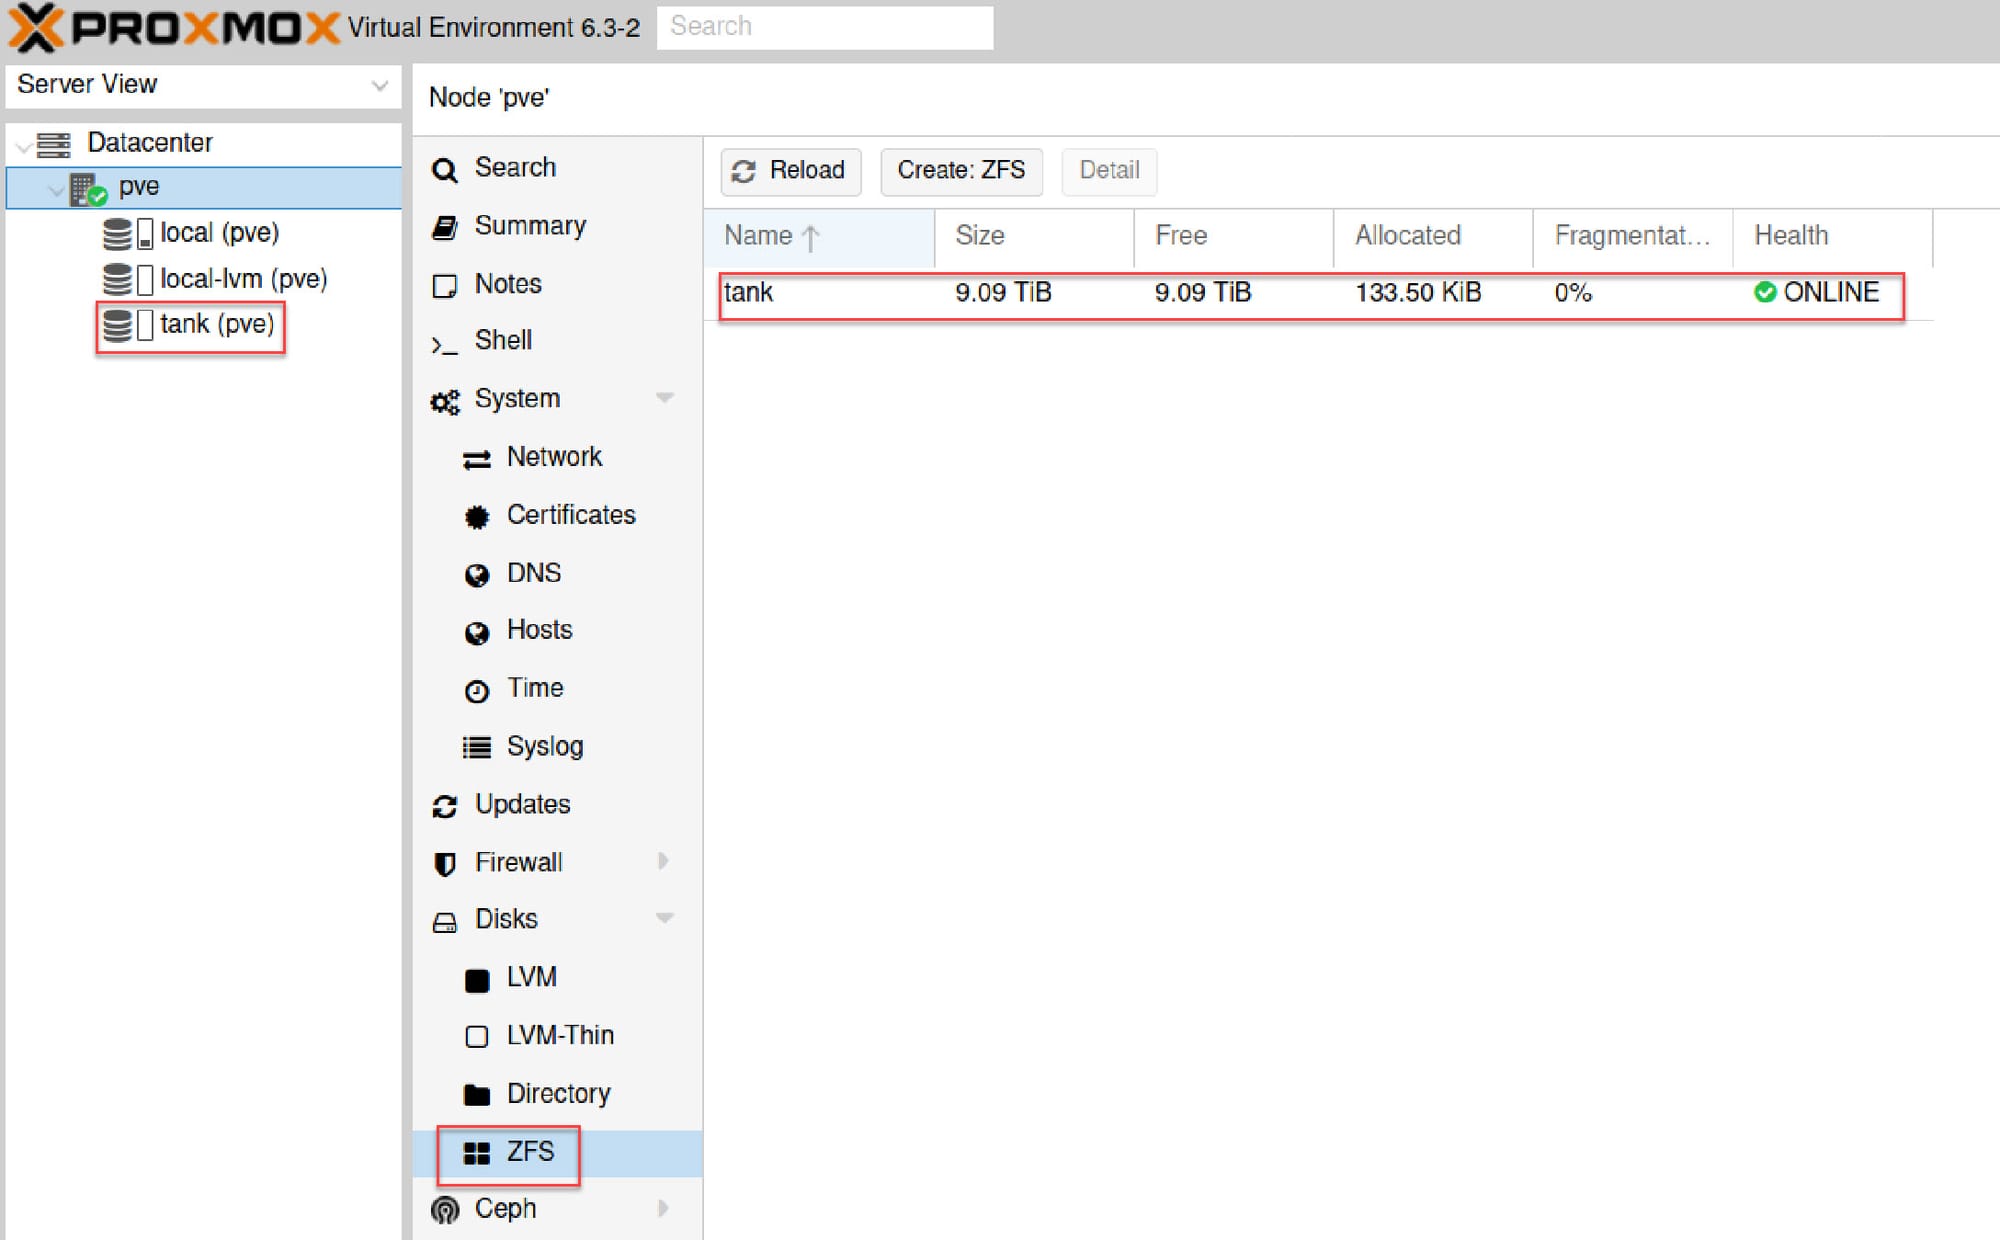
Navigate to Datacenter → Storage in the Proxmox web UI. You should see your new tank ZFS pool listed as available storage.
Alternatively, check Disks → ZFS and verify your pool status shows ONLINE and healthy.
Using Your ZFS Storage
Your ZFS pool is now ready! You can use it for:
✅ VM disk images - Select tank when creating VM disks ✅ LXC containers - Use as container storage ✅ Snapshots - Take instant snapshots before updates ✅ Backups - Store Proxmox backup jobs
Pro Tips:
- Enable compression:
zfs set compression=lz4 tank(minimal CPU overhead, great space savings) - Regular scrubs: Schedule monthly scrubs to verify data integrity
- Monitor pool health:
zpool statusto check for errors
Troubleshooting
Pool won't import after reboot?
- Check if you're using persistent identifiers (
/dev/disk/by-id/) - See our ZFS disk identification guide
Performance issues?
- Make sure your RAID controller is in HBA/IT mode
- Consider adding an SSD for L2ARC cache
- Check RAM—ZFS loves memory (ECC recommended)
Disk failed?
- Replace the failed disk
- Use
zpool replace tank /dev/disk/by-id/old-disk /dev/disk/by-id/new-disk - Pool will resilver automatically
Next Steps
Now that you have ZFS storage in Proxmox, you might want to:
- Create VMs using your new ZFS storage
- Set up automated snapshots
- Configure Proxmox Backup Server
- Explore ZFS compression and deduplication
Questions? Drop a comment below or check out the Proxmox documentation on ZFS.